
My parents gave me this great old glider rocker a few weeks ago. It was perfect for the baby's room, it just needed a little sprucing up to fit in with everything else. So, with the help of my husband James, I got this old gal dolled up and ready to go out on the town. Or in my baby room.

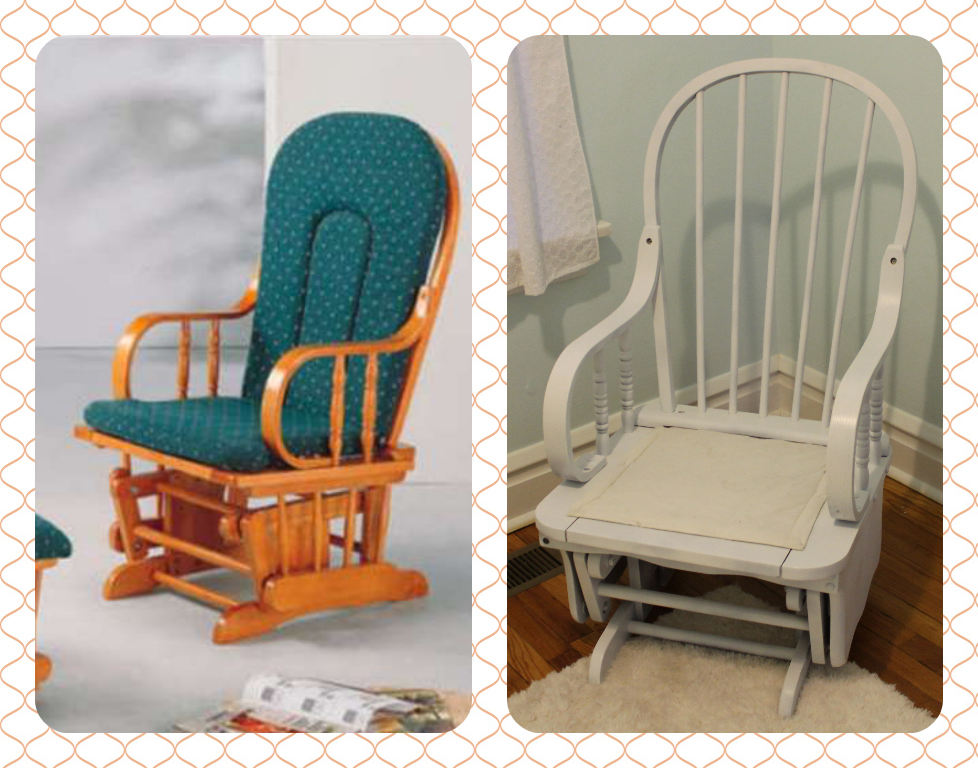
In my excitement to get started, I forgot to take a before picture. So the left image is the closest image I could find to what it looked like before, and the right is the actual chair after James painted it white for me.

Here is Franklin inspecting the original cushions. He was very intrigued by this whole process. I took off the old cover, but kept the foam insert from the bottom cushion. I ended up just trashing the back cushion. The fabric was sewn right into the foam and I didn't have the time or the patience to seam rip the whole thing. I traced around the original cushions to create my pattern for my new ones.

I chose an indoor/outdoor fabric for my new seat cover. I think it will withstand wear and baby for much longer than other textiles. I added a zipper to the bottom cushion so I can wash it if I need to. Then I used my trusty old Montgomery Ward 2000 to sew my new covers. I had to alter my cover a bit once I tried it on the cushion, but my pattern worked well for the most part. I added ties to the top of the back cushion and the rear of the bottom cushion to secure them to the rocker. When I made the back cushion, I stitched a zigzag seam down the middle of the cushion to keep in the micro fill I stuffed it with.

I ended up adding in a central panel to secure the back pillow and create a seamless look. I am very happy with the way it turned out, and I can't wait to keep this baby room DIY train rolling.
Here is Franklin inspecting the original cushions. He was very intrigued by this whole process. I took off the old cover, but kept the foam insert from the bottom cushion. I ended up just trashing the back cushion. The fabric was sewn right into the foam and I didn't have the time or the patience to seam rip the whole thing. I traced around the original cushions to create my pattern for my new ones.
I chose an indoor/outdoor fabric for my new seat cover. I think it will withstand wear and baby for much longer than other textiles. I added a zipper to the bottom cushion so I can wash it if I need to. Then I used my trusty old Montgomery Ward 2000 to sew my new covers. I had to alter my cover a bit once I tried it on the cushion, but my pattern worked well for the most part. I added ties to the top of the back cushion and the rear of the bottom cushion to secure them to the rocker. When I made the back cushion, I stitched a zigzag seam down the middle of the cushion to keep in the micro fill I stuffed it with.
I ended up adding in a central panel to secure the back pillow and create a seamless look. I am very happy with the way it turned out, and I can't wait to keep this baby room DIY train rolling.

Looks Great! Thanks for Sharing!
ReplyDeleteThanks!!!
Delete